Warning, extremely old Photoshop tutorials ahead!
These Photoshop tutorials are extremely old, we're talking around 1999 here, so we can't even remember what version of Photoshop
that was. So rather than get rid of them we thought we'd help out the people that still find them useful and celebrate our web design
heritage by keeping them here.
For the keen eyed among you, you can even spot the extremely old HTML from back in the day when web design was a little bit simpler (Mmmm, font tags). No responsive web design here!

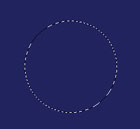 |
Start with a new RGB image. Fill it with dark blue. Click on the marquee tool and whilst holding the shift key draw a circle.
| |
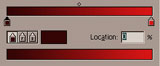 |
Click on the gradient tool and choose Black, White from the Gradient options box Click on Edit and change the colours to Dark Red and Light Red. |
|
 |
Click on the airbrush icon and change the fore-colour to the same as the dark red in the gradient. Just use the colour picker and click on the darkest part of the circle. Change the pressure to 5 (in the options box) and gently move the airbrush diagonally across the circle until a darkish line appears. Try and make the line look a little blurred. If you are unsure about it create a new layer and draw the line then merge the two layers together. |
|
 Click to see a larger image. |
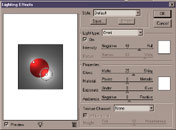
Next we add the light effect. Chose Filter > Render > Lighting Effects. Position the light at the top of the circle where the lightest shade of red is.
The settings I used were
The screenshot opposite shows where I have placed the lights. |
|
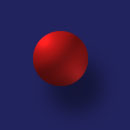 |
Basically that's it... If you are using PhotoShop 5 add a shadow by right clicking on the layer and choose Effects > Drop Shadow The settings I used were : Opacity - 40, Angle - 120, Distance - 62, Blur - 21 and Intensity - 0 Other wise create a new layer and CTRL + Click on Layer 1 Fill in the circle with black and use gaussian blur with a small setting... |